Step 1: First, click on the zip file (like the one below). A file containing the icons will open on your desktop. I always think of this like a little surprise gift!

Step 2: Below I've chosen an "untitled folder" as the icon I want to replace. I'll be replacing the "untitled folder" icon with our very own "Fuji Finder" icon included in the Kaijubees Icon set at www.peachpops.com. (Note: If you'd like to replace the "finder icon" with the "Fuji Finder" icon, you'll need a program like Panic's CandyBar.)
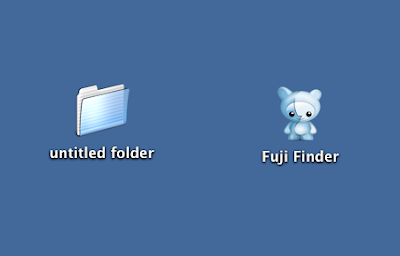
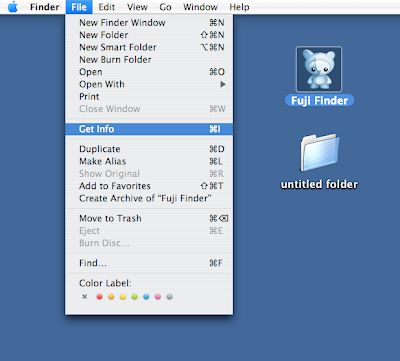
Step 3: Place your cursor over the icon you'd like to use and click once. This will highlight the icon on your desktop as seen below. Then you'll want to go to the Finder Menu and under FILE scroll down to the "Get Info" (or Apple and the letter I) and click again.
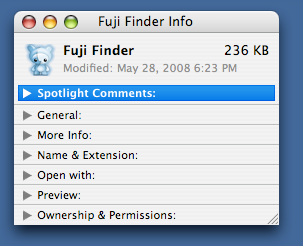
Step 4: Below you'll see the Finder Information window that appears when you "Get Info." Now you'll want to click on the icon that appears in the Finder Information window. A small blue outline will appear around the icon in the Finder Information window.
Step 5: Still keeping the Finder Information window open, go to the Finder Menu>EDIT>COPY (or Apple and the letter C).
Important : Do not close the "Finder Information" window yet.
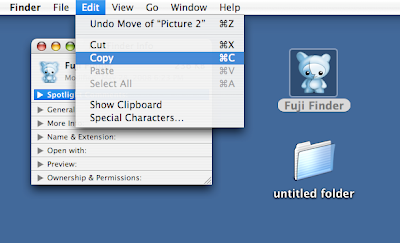
Step 6: Still keeping the Finder Information window (will be dimmed like below) on the desktop, repeat Step 3 and Step 4 for the icon you want to replace.
Important : Do not close the "Finder Information" windows yet.
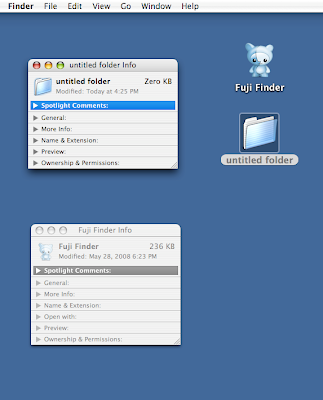
Step 7: Now, with the blue highlight around the icon in the "Finder Information" window, go to the Finder Menu>EDIT>PASTE (or Apple and the letter P).
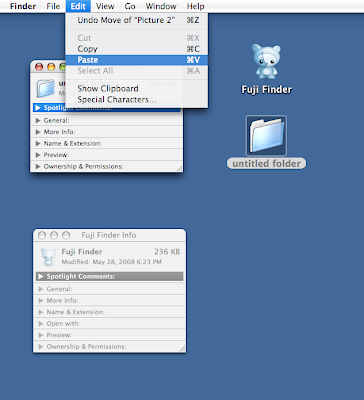
Ta da! Just like magic, you're "untitled folder" icon has been replaced with the "Fuji Finder" icon!
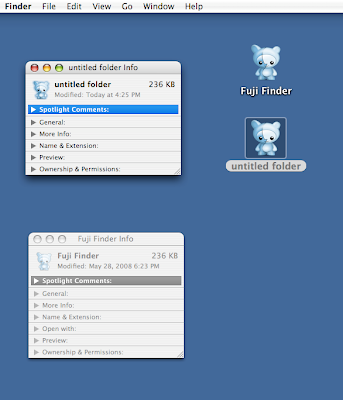
The final result looks like this:

Pat yourself on the back! Wasn't that easy? Essentially it's a copy and paste.
I hope you enjoy this tutorial and drop me a line if you find it useful!
Bark at you later,
PJ the dog blogging dog :-)


1 comments:
Hi,
Thanks for the instructions, but I still can't figure out how to change the spinning ball cursor.
Help?
Post a Comment